![]()
![]()
Simple glass floor (or roof!) tiles for Sims 2
This tutorial is based on and largely drawn from Frillen's tutorial on Mod the Sims 2. It's here for my convenience, and hopefully yours. I've included screenshots from SimPE as it can be a rather frightening program and images contain lots of information!
You need Homecrafter Plus and SimPE.
This tutorial was made using SimPE version 0.56, you can get the latest version from http://sims.ambertation.de/
Open Homecrafter, which you can get from http://thesims2.ea.com/getcoolstuff/homecrafter.php (Be patient; it takes a few minutes to open on my machine.)
Create a new floor tile.
Set all the options as you like them to be in the finished version. (I set it to
marble, to give the right sound when walked on, to show up in Miscellaneous, to
price §1, to be a one tile repeat.)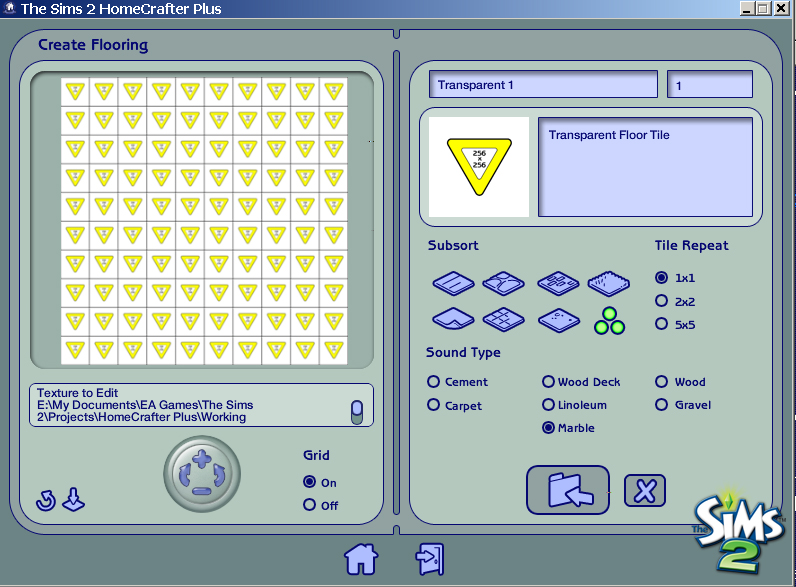
Use a plain blank purple image 256x256 pixels for this. It won't show up in play; but the smaller the better.

I write on it to make it easier to find in the Catalogue.
Save this image as a BMP over Template.bmp in \My Documents\EA Games\Projects\Homecrafter Plus\Working Directory.
Import the tile into your game. Close Homecrafter Plus.
Find your file in Downloads. My Documents\EA Games\The Sims 2\Downloads.
It may be easier to find it by sorting the files by date.
Right-click on the file and rename it to something sensible.
Open SimPe
File: Open your new file in SimPE. Again, it may take a moment to load.
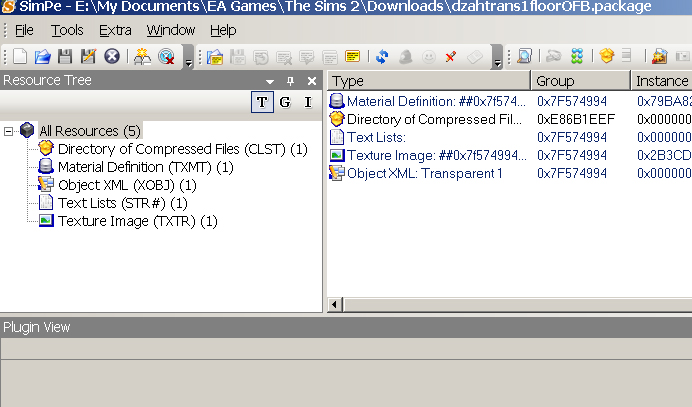
Select 'Material Definition'
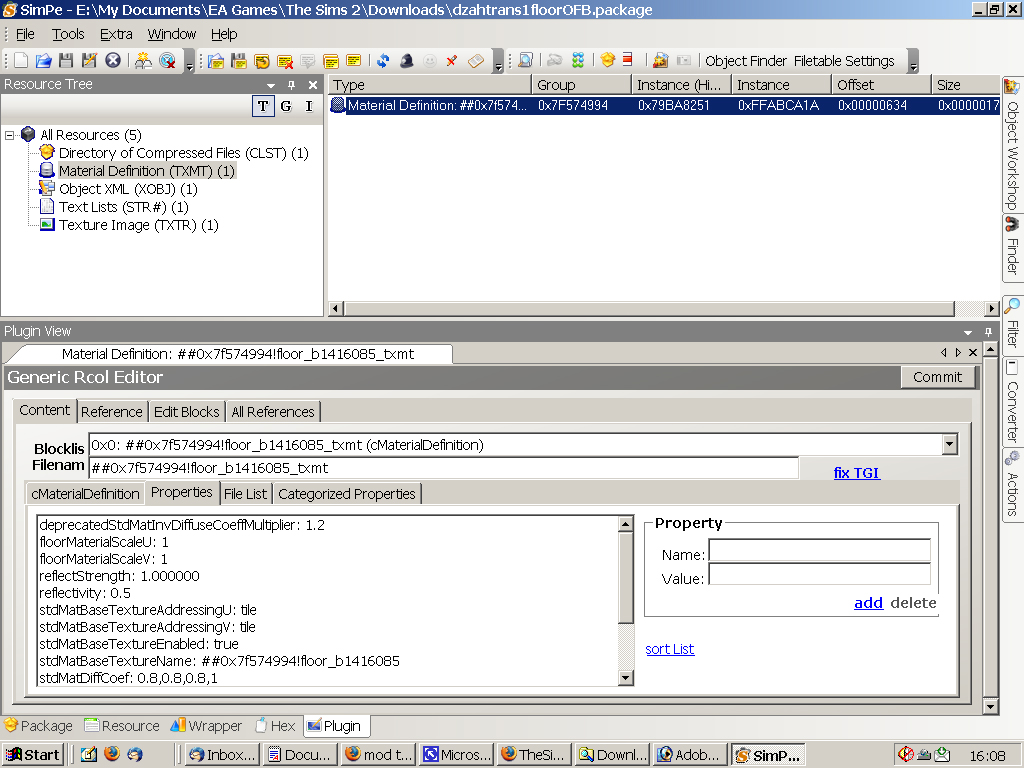
In Plugin View, select the Content tab and then the cMaterialDefinintion
tab - see the highlighted area in the image below.
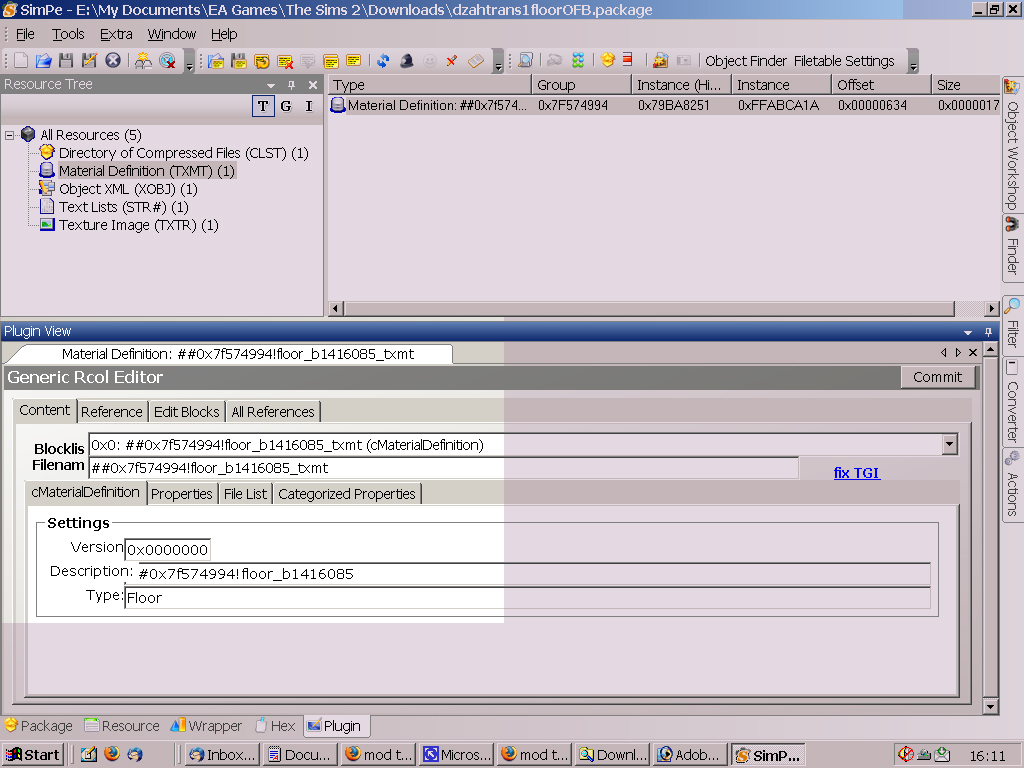
Now change the Type from Floor to StandardMaterial
Now select the 'Properties' tab.
These are the values and names that you need.
| stdMatAlphaBlendMode | blend |
| stdMatLightingEnabled | 0 |
| stdMatBaseTextureEnabled | false |
| stdMatDiffCoef | 0.76,0.4,1 |
| stdMatUntexturedDiffAlpha | 0.3 |
Those properties that are not there can be added: to add a value, press the 'add' button; click on the colon that appears at the bottom of the left-hand box, and enter the Name & Value. (These settings are what enable transparency).
Although you can, it's best not to delete the bitmap file or it can crash your Homecrafter if you try to clone it.
Explanations:
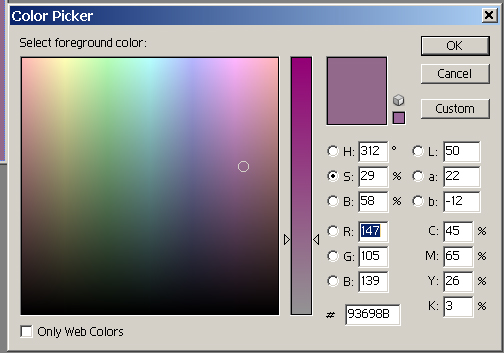
'stdMatDiffCoef' has 3 values, which represent the RGB values which control the color of your glass tile.
In the shot from my Photoshop here, you can see the RGB values of the basic purple I used for my tile.
To convert the numbers for use in SimPE, divide each value by 255 and round
to 2 decimal places.
'stdMatUntexturedDiffAlpha' defines how transparent your tile will be.
It needs a value between 0 and 1 with up to 2 decimals, ranging from 0,
completely transparent, to 1, completely opaque).
Commit
Save
Test ingame
Dzah 06 04 07